
Goblin Valley and Fisher Towers: Finding Photos Nobody Else Gets
I'd been wanting to shoot both of these Utah locations for a while. Goblin Valley and Fisher Towers are only about two hours apart, which makes them a natural pairing for a weekend trip. After spending two days out there in February, I can tell you it's one of the best back-to-back combos in the entire Southwest for landscape photography.
Here's everything you need to know to plan the same trip, along with how I approached finding compositions that most people walk right past.
Goblin Valley State Park: Utah's Most Alien Landscape
Goblin Valley is one of those places that doesn't look real in photos and somehow looks even more surreal in person. The hoodoos, thousands of them scattered across a wide open valley, have been eroded into mushroom-shaped formations that genuinely feel like something from another planet. You'll understand why it's been used as a Mars stand-in in films.
What surprised me most was how uncrowded it felt once I got moving. There's a main overlook that everyone heads to first, but the moment you drop down into the valley and start wandering, you can find pockets where it's just you and the goblins. That's where the interesting compositions are. Not from the overlook but from down inside, looking up through the formations.
The Three Sisters formation at sunrise was one of my favorite moments from the whole trip. The warm light hitting those three tall hoodoos with the dramatic sky behind them was exactly the kind of shot I'd driven out there for. Getting there early before other visitors arrive is key. The light is better and you'll have the formations to yourself.
Photography Tips for Goblin Valley
The biggest mistake most people make at Goblin Valley is shooting from the same overlook as everyone else. Get down into the valley floor and use the hoodoos as foreground elements. Stack them against the sky or use negative space between formations to create depth. The shapes are so unique that almost any low angle looking up through them becomes interesting.
Sunrise and sunset are both strong here. The warm tones of the sandstone glow orange and red in golden hour light which pairs beautifully with any blue sky or dramatic clouds. Midday is harsh and flat so it's worth using that time to scout compositions for the evening shoot rather than trying to force shots in bad light.
Drone footage here is spectacular if you have one. Flying low and slow through the formations gives you perspectives that are simply impossible from the ground. Just check current regulations and make sure you're flying legally within the state park since rules can change so always verify before you go.
Goblin Valley Logistics
Permits and entry
You need a Utah State Park pass to enter Goblin Valley. No separate permit is required beyond that. The pass covers your vehicle entry so if you're already planning to visit multiple Utah state parks it's worth picking up an annual pass.
Camping
There is dispersed camping available right outside the park entrance which is a great budget-friendly option. You're essentially sleeping in the desert with the goblins just over the hill. Hard to beat that for an outdoor photographer looking for early morning access. If you prefer established sites there are campgrounds within the park itself as well.
Best time to visit
I went in February and it was around 55 to 60 degrees during the day which was genuinely perfect weather for hiking and shooting. Crowds were minimal for a weekend which made the experience even better. Spring and fall are both excellent windows. Summer gets very hot in the Utah desert and the midday light is brutal for photography.
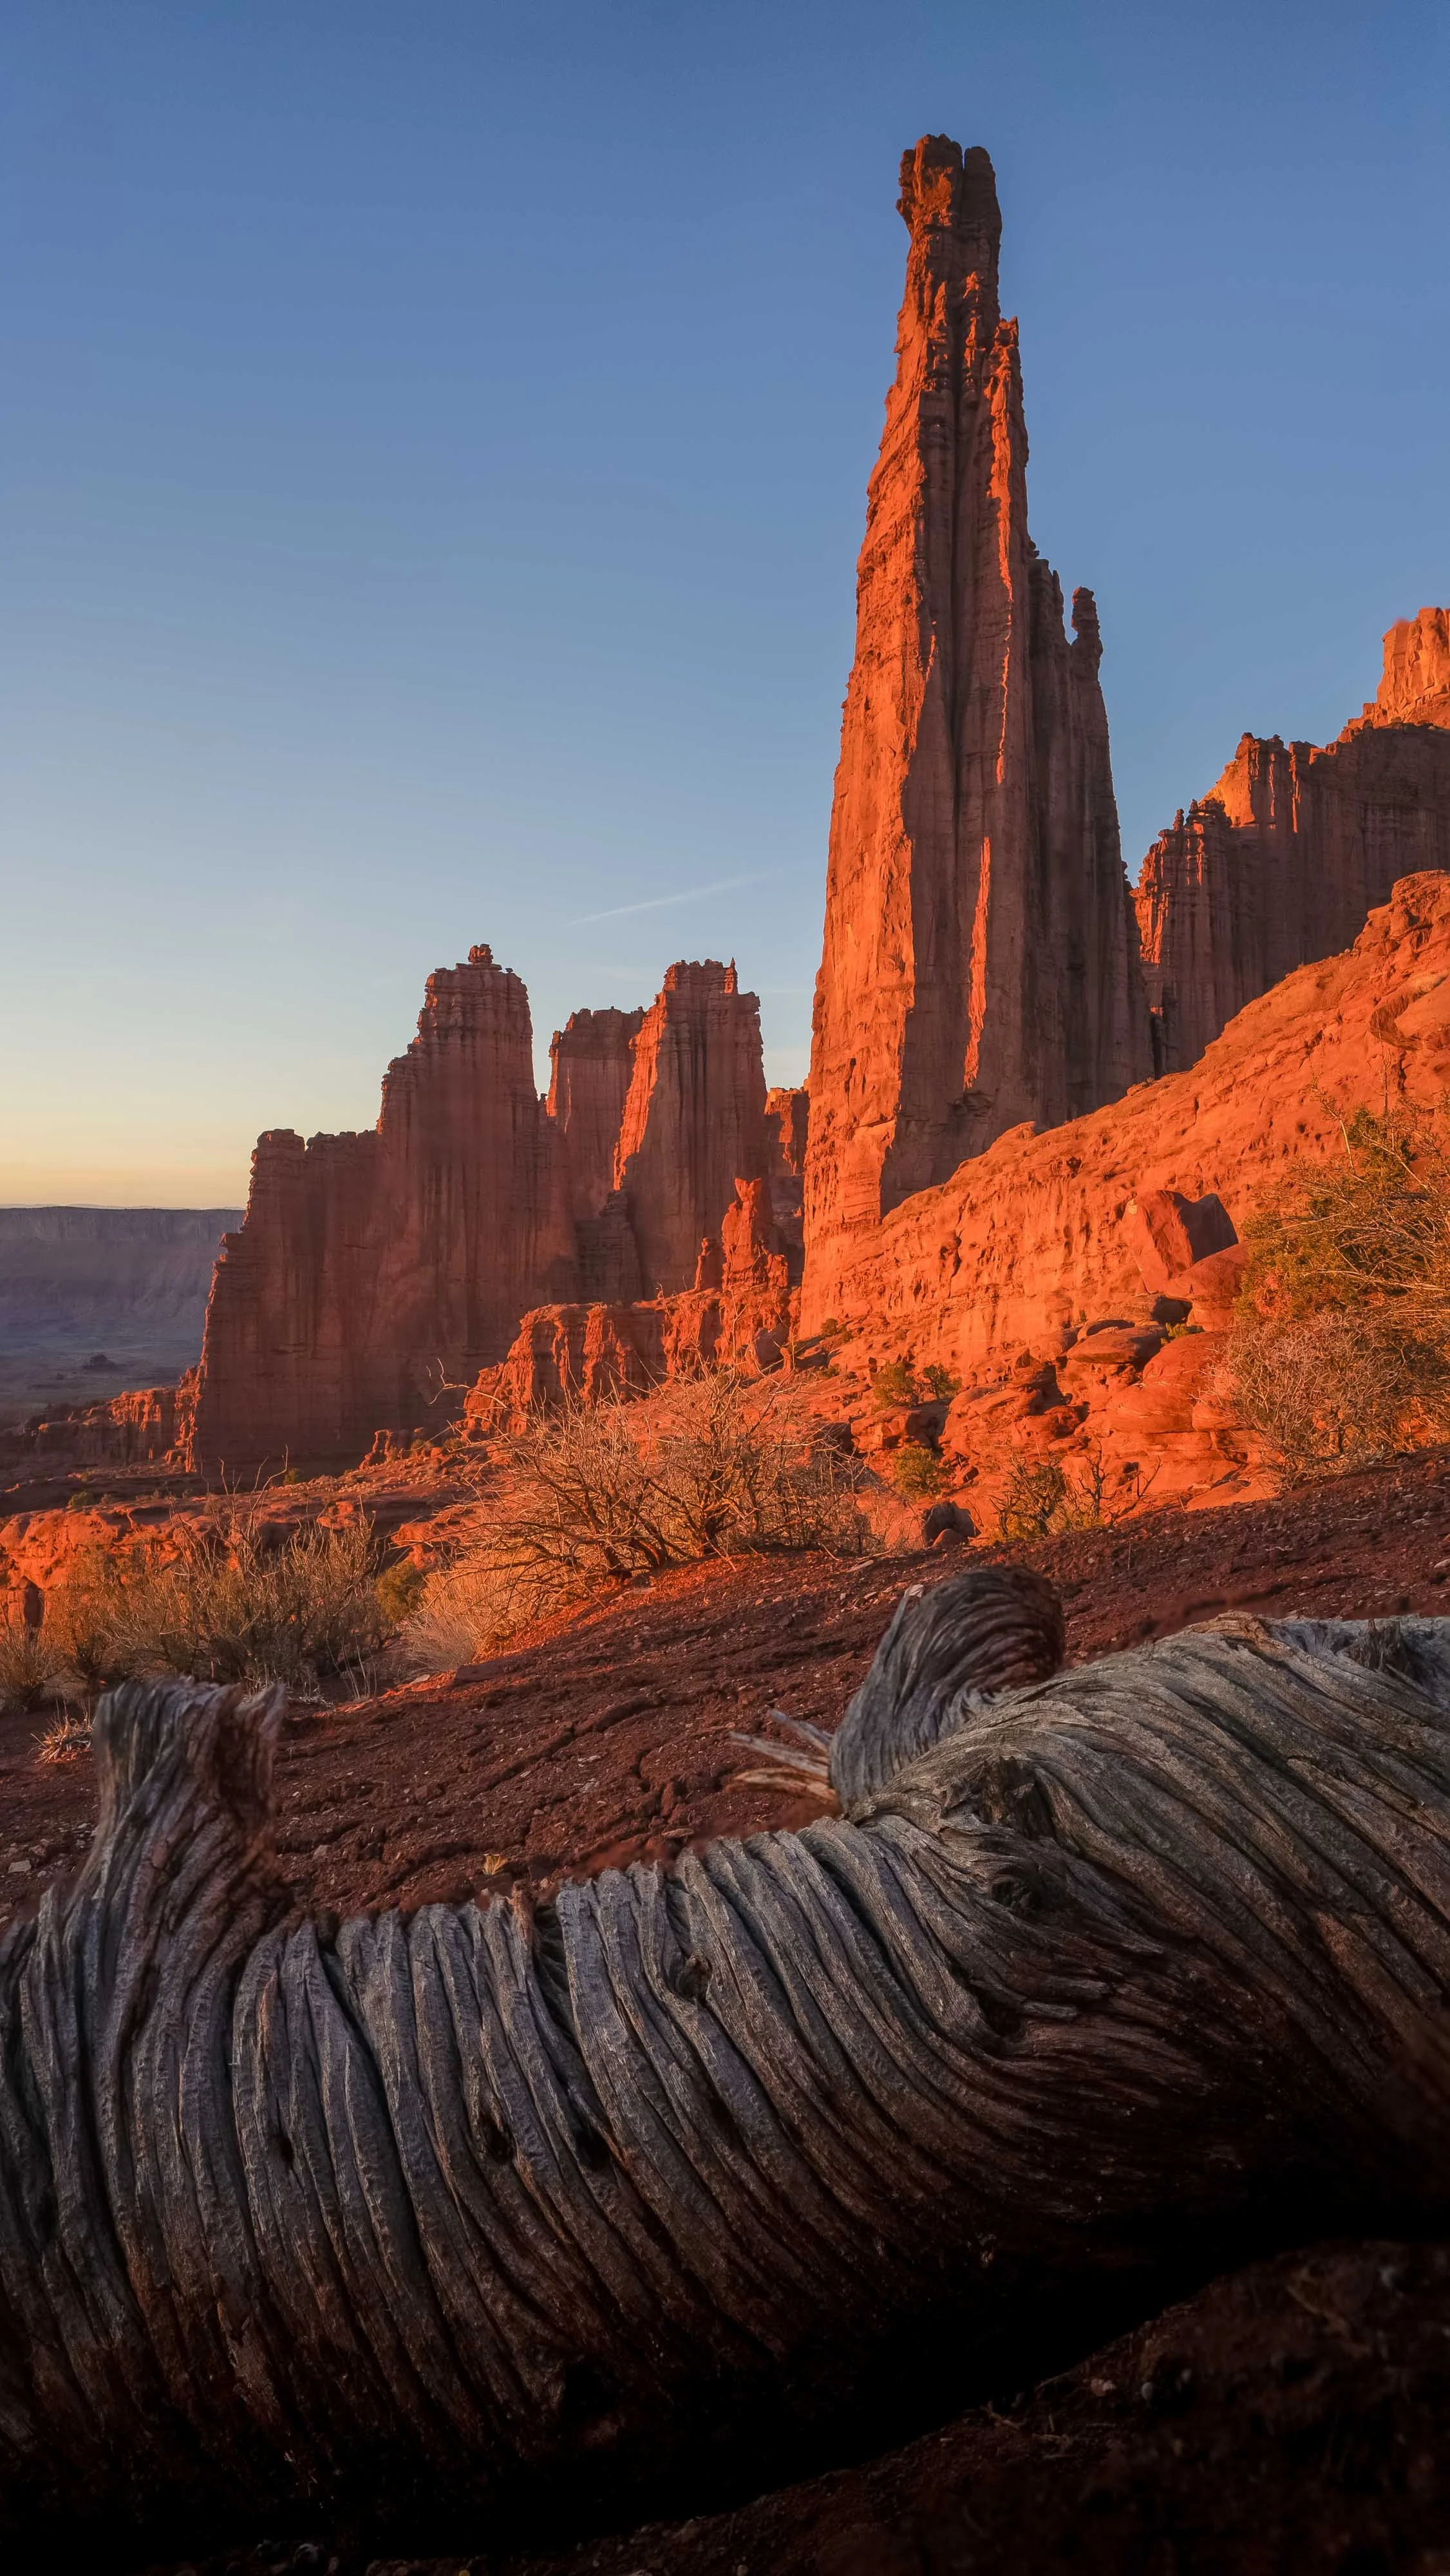
Fisher Towers: Harder Than Expected, Worth Every Step
Fisher Towers is about a two hour drive from Goblin Valley, which made it a natural second day on this trip. I'll be honest though. The hike was harder than I expected going in. At about 4.6 miles round trip it's not a massive day, but the terrain is rugged and there's one section with a ladder that adds a fun technical element. Nothing that requires climbing experience, but not a casual walk either.
What I didn't expect was just how many great photo spots are spread throughout the entire hike, not just at the end. Every turn reveals a new angle on the towers. Massive rust-red spires shoot straight up out of the Colorado River valley and the views got more dramatic the further I pushed. By the end of the trail the scale of the formations is genuinely staggering.
The drone footage I got at sunrise over the Utah desert on the morning I hiked Fisher Towers ended up being some of my favorite clips from the entire trip. The low angle light catching the red rock against the open sky is the shot that makes the whole drive worth it.
Photography Tips for Fisher Towers
Don't make the mistake of saving all your energy for the end of the trail. Some of the best compositions are in the first mile where you have clear sightlines to multiple towers at once. I found myself stopping constantly on the way in and was glad I left enough time to shoot on both legs of the hike.
The towers are so tall that getting low and using the desert floor as a leading line works really well. Wide angle lenses shine here because the scale of the formations against the sky is the story and you want to capture as much of that drama as possible. Telephoto can work for isolating individual spire details but wide is where you'll get your hero shots.
Sunrise is my recommendation over sunset here. The eastern light hits the red rock towers directly in the morning which saturates the color in a way that afternoon side light doesn't quite match. Getting to the trailhead early also means you'll have the trail mostly to yourself for the first hour.
Fisher Towers Logistics
Permits
No permit is required for the Fisher Towers trail. It's managed by the Bureau of Land Management and is free and open access. That's one of the things that makes it such a great find compared to the permit-heavy alternatives nearby.
Camping
There are first come first served campsites right near the Fisher Towers trailhead for $20 a night. Waking up with those towers right outside your tent is a pretty special experience and puts you in position for that golden hour sunrise light without a long drive.
Difficulty and trail notes
The trail is about 4.6 miles round trip. It's not technical but it is rugged so expect uneven terrain, some scrambling, and that one ladder section. Worth noting for dog owners: the ladder section would be difficult or impossible with a larger dog you can't easily carry. Solid hiking boots are a must here, trail runners at a minimum.
Planning the Weekend Trip
Goblin Valley and Fisher Towers work perfectly as a back-to-back weekend. Day one at Goblin Valley, camp near the park entrance, then drive the two hours to Fisher Towers for day two. You're covering two completely different landscapes in a single efficient trip. The otherworldly hoodoo maze of Goblin Valley one day and the dramatic vertical spires of Fisher Towers the next.
February worked really well for this trip. The crowds were manageable for a weekend, the temperatures were ideal for hiking, and the winter light has a quality that summer just doesn't. If you're planning a Utah photography trip and looking for something beyond the usual Zion and Bryce Canyon circuit, this combination is hard to beat.
Both locations rewarded slowing down and looking for angles most people walk past. That's the thing about landscape photography in a place like this. The iconic view from the overlook is just the starting point. The real shots are out there waiting for whoever is willing to wander.